Observing Hints
Direct Imaging | Flat Fields | Arc Lamp Calibrations | Overscan Subtraction | Acquisition and Guiding | Centering on very faint objects | Scripts | SpectroPolarimetry | Imaging Polarimetry | Setting the Blue X-Stage | Setting the Grating TiltDirect Imaging
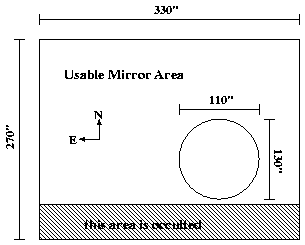
Direct images may be taken on both sides. Use "Open" for a wide open decker, and "Open" for a wide open slit. The unvignetted field of view is about 145 arcsec square (337 pixels at ~0.43 arcsec/pixel). A suggested blue-side window using the direct mirror is number of rows = 325, number of columns = 325; start row = 850, start column = 850. For the red side, with the tilted flat mirror in the grating tray at grating tilt 8800, use window 350, 410, 2020, 424. Check direct windows with the top lights, not the TUB lamps. An obvious diffculty is that most of our filters are 2" square and must go in the user filter wheel. Their use instead in the red or blue side filter holders where the beam is 3.5" in diameter will reduce the effective aperture to about a meter; you may as well use the 40" and avoid the wrath of Practically Everybody. A more reasonable course is to put the 2" filters in the user filter wheel, which will utilize the full beam, and just use one side for the observation.Flat Fields
WARNING: If wishing to acquire (flat, arc) calibrations during night operation, please inform/coordinate with staff before proceeding. The Andor camera (installed in late 2020) as the Shane Cassegrain guider may be adversely affected by prolonged exposure to intense light levels generated by calibration lamps. By default, for calibrations during day operation a protective shutter is deployed on the guide camera. In general, you will need a number of flats well exposed at the red end in order to get a reasonable total number of counts at the blue end. When you are calculating the statistcal accuracy of your flats, remember to convert from DNs to electrons.In general to do dome flats you will want to configure the telescope and dome as follows:
- Open the mirror cover.
- Turn off lights in the dome.
- Set the diagonal position to either 3 or 4.
- Turn on the appropriate flat field lamp.
- Take test exposures to determine appropriate exposure time.
- Take flat fields (Note, in general the slit width and length for dome flats should match what you intend to use on the sky for data acquisition).
- When completed, please turn off the lamps.
Arc Lamp Calibrations
WARNING: If wishing to acquire (flat, arc) calibrations during night operation, please inform/coordinate with staff before proceeding. The Andor camera (installed in late 2020) as the Shane Cassegrain guider may be adversely affected by prolonged exposure to intense light levels generated by calibration lamps. By default, for calibrations during day operation a protective shutter is deployed on the guide camera. There are a large number of arc lamps available for calibrating Kast spectra. The following combinations of lamps are often used:- Blue Side: He, Hg-Cd
- Red Side: Neon, Hg-Ar, He
In general to do arc lamps you will want to configure the instrument as follows:
- Turn on appropriate arc lamps.
- Move the diagonal mirror to position 2.
- Set the slit to be 0.5 arcsec wide (Note, this may not be suitable for all programs or data reduction, but is the most commonly used slit width for arc lamp exposures).
- Take test exposures to determine appropriate integration time.
- Take arc lamp calibration frames.
- When done, please turn off the lamps.
Overscan Subraction
The number of overscan columns per amplifier is listed in the COVER keyword in the FITS header of Kast data. COVER should be 32 for Kast blue data and 100 for Kast red data (though it is possible for it to be some other value, it is very unlikely).
The both red and blue CCDs use two amplifiers for readout. Hence there are two overscan regions, each 32 (or 100 for red) columns wide. The all columns of overscan are at the righthand side of the image. The first 32 (or 100 for red) columns of overscan are for the left hand side of the image, the second 32 (or 100 for red) columns are for the right hand side of the image.
The IDL script kastbias.pro will properly identify the data and overscan regions based on the FITS header information, subtract the overscan region(s) from the data and write out a new file containing the overscan subtracted data with an updated header.
Syntax:
kastbias,InputFitsFile,OutputFitsFile[,/legendre]
InputFitsFile is the raw data file with overscan regions.
OutputFitsFile is the new data file containing the overscan subracted
data.
/legendre is an optional keyword to do a third order legendre fit to
the overscan region. If one does not use this keyword the overscan
value subtracted from each row is simply the mean of that row's
overscan values.
Examples:
kastbias,'r100.fits','r100new.fits'
kastbias,'b346.fits','newimage.fits',/legendre
A python script to do overscan subtraction from a list of FITS files is also available: overscanLickObs.py for Python 2.7 and overscanLickObsP3.py for Python 3. This script will correctly identify the overscan and data regions regardless of binning or subregion of the Lick Observatory detector read out or whether one or two amplifiers are used. Each row of the overscan is median combined and optionally a third order legendre polynomial is fit to the overscan. This is then subtracted from the data region and written to a file.
Syntax:
overscanLickObs.py -f -i inputfilelist -o outputfilelist
or
overscanLickObsP3.py -f -i inputfilelist -o outputfilelist
-f is an optional argument to indicate that the Legendre polynomial
fit is desired (this is recommended for most data).
inputfilelist is a text file containing the names (one per line)
of the FITS files for which you wish to do overscan subtraction.
outputfilelist is a text file containing the names (one per line) of
the output FITS file names. This file should have the name number of
lines as inputfilelist. outputfilelist may be the same as
inputfilelist, which will overwrite the original files with the new
overscan subtracted files.
Examples:
overscanLickObs.py -f -i rawdataList.txt -o overscanSubtractedList.txt
overscanLickObs.py -i inFitsList.txt -o outFitsList.txt
overscanLickObs.py requires python packages numpy and astropy. Also, this script assumes that the path to python is /usr/bin/python. If that is not the case on your machine, you may have to edit the first line of the program with the proper path. Bug reports, comments, and suggestions for overscanLickObs.py should be directed to Elinor Gates (egates@ucolick.org).
Acquisition and Guiding
A very sensitive CCD camera is used for object acquisition and
guiding. It is mounted on a remotely controlled x-y stage for offset
guiding. The field of view is about 2 arcminutes with the diagonal
mirror in position 2. Once the field is identified, the object will be
positioned on the slit (either directly or with blind
offsetting). If possible, the night assistant will guide off the
science target on the slit. Otherwise, the NA will look for an
off-axis guide star.
Centering on very faint objects (blind offsetting)
If the object is too faint to visually center it on the slit, then a major advantage of this spectrograph design becomes apparent. In almost any case one might imagine, you can dead reckon the object to within an arcminute or so of the slit center. Then, take a direct image of the object while offset guiding to prevent drift, identify your object (down to 23rd mag is not unusual), and use the telescope offset routine to move the telescope so as to center the object in the slit for a spectroscopic observation.Here are two important hints: 1) be sure to turn off the autoguider during moves, and 2) all of the experienced observers take another direct image after the move to verify that the telescope moved as desired.
Scripts
There are currently two scripts available to take loops of exposures on the red and blue sides of kast. These scripts are run from the command line on gouda, karnak, or shanevnc. As scripts are added they will be documented here. If you need a specialized script, please contact a support astronomer (sa@ucolick.org) in advance of your run to see if your needs can be accomodated.- igetred: Script to take a series of exposures with the Kast Red CCD.
Syntax: igetred NumExposures PauseTime sel=Num
NumExposures is the number of exposures you wish to take with the current exposure parameters.
PauseTime is an optional parameter and is the time (in seconds) between the end of one exposure and the beginning of the next.
sel=Num is an optional parameter and is the number of the currently selected setup in the data-taking software. If no setup is specified, igetred assumes selection 0 (e.g. sel=0). Warning: The setup selected in igetred must match the current setup number in the data-taking software. If it does not, there will be a mismatch of parameters and exposures may fail, have the wrong exposure time, readout parameters, etc.. - igetblue: Script to take a series of exposures with the Kast Blue CCD.
Syntax: igetblue NumExposures PauseTime sel=Num
Operation is exactly the same as igetred described above.
- Polarimetry can be scripted with the igetter script. This script
can cycle through a sequence of waveplate positions taking a series of
exposure at each waveplate position and repeat that loop as desired.
The exposure parameters must be set using the UCAM data taker GUI.
The script also gets the object name from the data taker and appends
labels for the waveplate positions at the end of the object string.
One can choose to use 4, 8, or 16 waveplate positions spaced by 22.5
degrees. At the end of the script the object name is returned to its
original value and the waveplate rotation is reset to 0.0 degrees.
Syntax: igetter pol=Pol side=Side n=Num nloop=NLoops
The pol and side arguments are required. If n and nloop aren't specified, they default to 1.
Pol can be specified as 4, 8, or 16.
The sequence of waveplate positions when pol=4 is {0.0, 45.0, 22.5, 67.5} degrees.
The sequence of waveplate positions when pol=8 is {0.0, 45.0, 22.5, 67.5, 90.0, 135.0, 112.5, 157.5}
The sequence of waveplate positions when pol=16 is {0.0, 45.0, 22.5, 67.5, 90.0, 135.0, 112.5, 157.5, 180.0, 225.0, 202.5, 247.5, 270.0, 315.0, 292.5, 337.5}
Side is either red or blue, for taking exposures with either the Red CCD or the Blue CCD.
Num is the number of exposure at each waveplate position.
NLoops is the number of times you want to loop through the waveplate positions.
Examples:
igetter side=red pol=4
will take one exposure with the red side CCD at each of four waveplate rotations: 0, 45, 22.5, and 67.5 degrees.igetter side=blue pol=8 n=2
will take two exposures with the blue side CCD at each of eight waveplate rotations: 0, 45, 22.5, 67.5, 90, 135, 112.5, and 157.5 degrees.igetter side=blue pol=4 nloop=2
will take one exposure with the blue CCD at each of the four waveplate rotations, then repeat the entire procedure.igetter side=red pol=4 n=3 nloop=3
will take three exposures with the red CCD at each of the four waveplate rotations, then repeat the entire procedure three times.Note: You can only use this script on one side of the spectrograph at a time even though the polarimeter is shared by both sides of the spectrograph. This issue should not generally arise because users are discouraged from doing spectropolarimetry with a dichroic in the light path (see Polarimetry below for more information).
If you need to abort the script for some reason, simply type ctrl-c twice in the window in which you started the script. The first ctrl-c will stop the action in progress and the second one will actually stop the script. If an exposure is in progress, it will finish unless you click on "Abort and throw away" in the data-taker GUI. Side effects of aborting the igetter script are numerous, but easy to deal with: 1) If there is an exposure in progress, the first ctrl-c likely initiated the next waveplate rotation move, which will corrupt the data in the current exposure, so it is recommended to Abort the exposure once the script is aborted. 2) The object name will be left with the waveplate rotation appended, so resetting the object name is recommended. 3) The waveplate will not be reset to zero, so one should check to make sure the waveplate is in the desired position before taking subsequent data.
Polarimetry
To do polarimetry the polarimeter module must be installed in Kast (currently this is the default). Put the waveplate into the light path by selecting a rotation angle for the waveplate from the kast controller software. This will give you a split spectrum (one polarization on the top, the other on the bottom). For certain calibrations you will also have to select the 'filter' - which is actually a polarizing filter (not be confused with the 'polaroid' filter, which is only good for wavelengths < 7300 Angstroms) - in the Upper Filter Wheel. The waveplate is rotated to any one of four positions (or 16 if you choose "More Options") from the Kast motor control GUI. Using the dichroic with the polarimeter is not recommended. It introduces uncalibrateable wiggles over the several hundred Angstroms in the vicinity of the dichroic crossover. The polarimeter shifts the spectrum on the CCD, so you will have to define a new Window to get all the data. Focusing in polarimetry mode is nearly the same as for regular spectroscopy. However, you should use the centerline option in kastfocus to choose the center row of the top or bottom spectrum for focusing otherwise the kastfocus program will assume the center row, which lies between the two polarization spectra. Data-taking proceeds as in regular observing, (including TUB rotation as necessary), except that you will want to take exposures with the waveplate in each of its four rotations (0, 22.5, 45, and 67.5 degrees). Most observers take data with the waveplate rotation in the following order: 0.0, 45, 22.5, 67.5 degrees. It is helpful to note that when using the polarizing filter and a waveplate rotation 0 degrees puts all the light of a calibration lamp in the upper spectrum, 45 degrees in the lower spectrum, and in 22.5 and 67.5 degrees the spectra are evenly split between the two. Additional calibrations are required for polarimetry: Polarizance test, Polarization standard star, and Null standards. (Descriptions courtesy of Ryan Chornock, UC-Berkeley)- Polarizance test: Observe a low polarization standard star with a polarizing filter in to produce 100% polarized light at a fixed position angle. This does two things. The first is to make sure that you measure 100% polarization (more or less) when you should. The second thing is to get the angle correction curve as a function of wavelength. The half-wave retarder has a fast and slow axis that are perpendicular to each other, with light polarized along the slow axis being retarded by 180 degrees of phase relative to the fast axis (by definition). However, the position angle picked out by the fast axis is a function of wavelength that varies by +/- 5 degrees over the optical range (see Goodrich 1991). You want to remove this variation so that an object whose intrinsic polarization angle is constant with wavelength is measured to be so. The polarizance test gives you the shape of this angle correction curve, but to set the zero point, you have to observe a polarization standard star. Some people observe dome flats through the polarizing filter to measure the angle curve (effectiveness of this method is not known by the Mt. Hamilton techinical staff).
- Polarization standard star: These are generally bright, relatively high-polarization stars with a cataloged polarization angle that has been shown to be constant. Observe one of these to set the zero point of the angle correction curve. A second one is nice to double-check the answer. Also, you can double-check that you measure the right degree of polarization.
- Null standards: Objects of intrinsically low polarization (generally < 0.1%) used to check the instrument. If you measure <0.1%, great! You don't need to any more calibrations. Generally we don't find instrumental polarization to be a problem. Sometimes, for reasons we don't understand, we do measure noticeable instrumental polarization (at several tenths of a percent level). You can use the null standards to remove the instrumental effects from your object observations, but that can be tricky.
Note that direct imaging polarimetry is also possible with Kast, though the field of view is reduced to about 40 arcseconds by the polarimeter. The necessary standards and calibration procedures are very similar to that for spectropolarimetry.
Further reading on polarimetry:Miller, J. S., Robinson, L. B., & Goodrich, R. W. 1988, in Instrumentation for Ground-Based Astronomy, ed. L. B. Robinson (New York: Springer-Verlag), 157 "A CCD Spectropolarimeter for the Lick Observatory 3-Meter Telescope" The basic reference for the instrument design and data reduction strategy. A couple of the equations (particularly for the errors) have typos in them.
Goodrich, R. W. 1991, PASP, 103, 1314 "High-efficiency 'superachromatic' polarimetry optics for use in optical astronomical spectrographs" A good description of the design of similar polarimeters.
http://www2.keck.hawaii.edu/inst/lris/polarimeter/manual/pol_v3.ps The LRIS polarimeter manual by Marshall Cohen (and updated by Aaron Barth). A description of a similar instrument that also describes the data reduction process.
Schmidt, G. D., Elston, D, & Lupie, O. L. 1992, AJ, 104, 1563 The best polarization standards, if you throw out the ones they mark as variable (!!). Used to calibrate HST.
Imaging Polarimetry
While Kast is mostly used for spectropolarimetry,
it is possible to do imaging polarimetry. The field of view is
smaller than for direct imaging, only about 40 arcsec x 40
arcsec. Because the dichroic beamsplitter introduces wavelength
dependent polarizations and the Lower Filter Wheel is in the common
path for both the red and blue detectors, only one side is typically
used for polarimetry at a time. If using the blue detector, the mirror
must be installed in the dichroic stage. If using the red detector,
set the dichroic to the Clear position.
The default filters in the Lower Filter Wheel are B, V, R, and I and either detector can see these filters. Changing to different filters must be requested in advance of your run. A list of 2" filters that fit in this filter wheel is on-line at Filters. The blue filter slide has U and Gunn G filters permanently installed.
Here is a general checklist for setting up Kast for imaging polarimetry.
- Insert waveplate and set to 0 degrees.
- Select a filter in the Lower Filter Wheel or Blue Filter Slide.
- Set the data taker Window for red and/or blue side detector. This is usually done by illuminating the chip with a flat field lamp. Note, if the polarization images fit in the existing spectrograph Window setting, one can use that rather than setting a unique window for imaging.
- Focus: This is done similarly to focusing in spectrographic mode using kastfocusp, however instead of just one spot created by the decker being at 1" or 2" long and slit at 0.5" wide in imaging mode, there will be one spot for each of the two polarization channels. Select both spots in kastfocusp to acquire the best focus. The BVRI filters are all parfocal so that focusing in one will give the proper focus for the other filters. If using other filters, you will need to check focus for each filter and save separate setups for each filter configuration.
- Polarization test: Test that the polarimeter is functioning properly.
- Insert the "filter" (this is a 100% polarizing filter) in the Upper Filter Wheel.
- Set up for a dome flat using the appropriate lamp and exposure time for the selected filter.
- Use the igetter script to take a series of images,
e.g. igetter side=red nloop=1 pol=4 n=1
Verify that for the red side (blue side is similar, but substitute top and bottom images):- 0.0 degrees: image on red side has right component bright, left component non-existent or minimal.
- 45 degrees: left component bright, right component non-existent or minimal.
- 22.5 degrees: both components about equal brightness.
- 67.5 degrees: both components about equal brightness.
- Set Upper Filter Wheel back to "Open" after test is complete.
- Dome Flats: Same as dome flats for direct imaging, but make sure that Waveplate is in and set to 0.0 degrees. There is no need to take dome flats at different waveplate rotations, so using igetred or igetblue to acquire flat fields is OK.
- On-Sky Calibrations: A couple of calibrations are required in
addition to the usual imaging calibrations, such as twilight flats.
- Polarization Standard Stars: Generally bright, relatively high-polarization stars with cataloged polarization angle that has been shown to be constant. Observe one to set the zero point of the angle correction curve. A second one is nice to double-check the answer. Also, you can double-check that you measure the right degree of polarization.
- Null Standard Stars: Objects of intrinsically low polarization (generally < 0.1%) used to check the instrument. You can use the null standards to remove the instrumental effects from your object observations, but that can be tricky.
Setting the Blue X-Stage
Here is an example of how to calculate how much the blue x-stage needs to be moved to get the desired wavelength coverage.
- Take an arc lamp exposure with the desired grism (recommended lamps are usually the He and HgCd to get good coverage on the blue side).
- Identify a line and determine what column it is on. For example, the 5460A Hg line is at column 1724.
- Look up the dispersion of the grism in use. For this example, we'll use the 600/4310 grism, which has a dispersion of 1.02 A/pix.
- Determine the wavelength at the extreme end of the spectrum. The blue detector has 2048 columns and in normal use all columns are read out to get the full wavelength coverage. Hence, in this example the reddest wavelength on the detector is 5460A + (2048pix-1724pix)*1.02A/pix = 5790A. The manual states the wavelength coverage range is ~2090A, so the blue end would be 3700. (Note you can do a similar calculation with a line at the other end of the spectrum with respect to column 0. We recommend doing the calculation at the end of the spectrum that is most important for your science.)
- For the sake of this example, let us say that the bluest wavelength needs to be 3450A. Hence, the detector needs to shift 250A. Blue x-stage moves are done in millimeters of motion of the detector, so we first need to convert Angstroms to pixels, then to millimeters. We know that the motion of the stage is 67pix/mm, so the conversion is 250A / (1.02A/pix) / (67pix/mm) = 3.66mm. Because we want the spectrum to be bluer, you would tell the telescope operator or support astronomer to move the stage +3.66mm.
- Take another exposure after the stage is moved to verify the motion was correct. If not, iterate to the proper position of the stage.
Here is an example of setting the grating tilt to get the desired wavelength
coverage.
Setting the Grating Tilt
Note that in many cases, the bluest wavelength is set to match the
dichroic beamsplitter, rather than setting for a particular central
wavelength. E.g. the bluest wavelength is desired to be 5700A to match
the D5700 dichroic, or maybe even 5600A to have some overlap with the
blue side when using the D5700 dichroic.