|
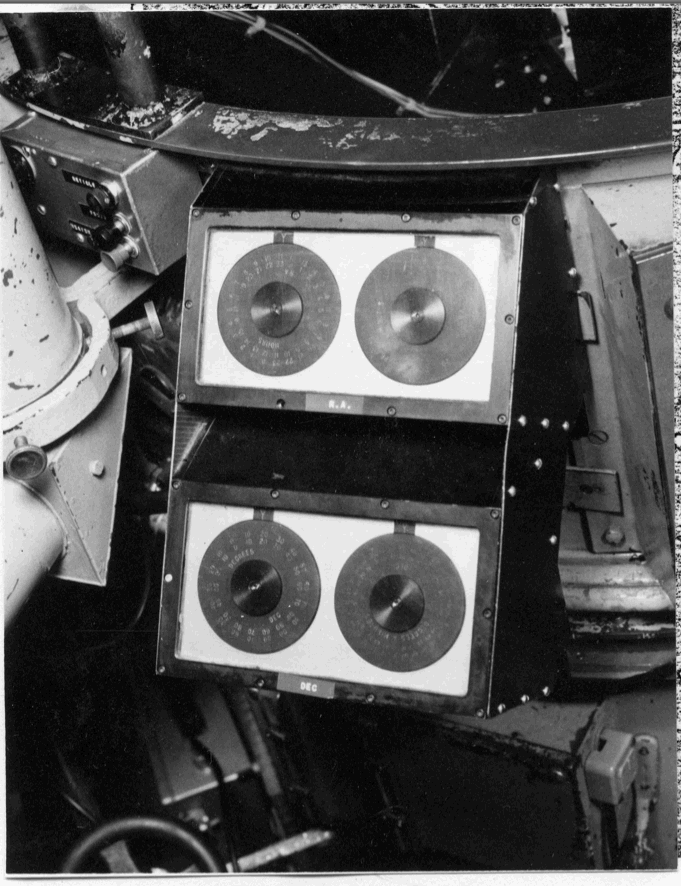
The RA and dec dial indicators are a double bank of dials mounted on
the telescope head to the left of the eyepieces beside the finder
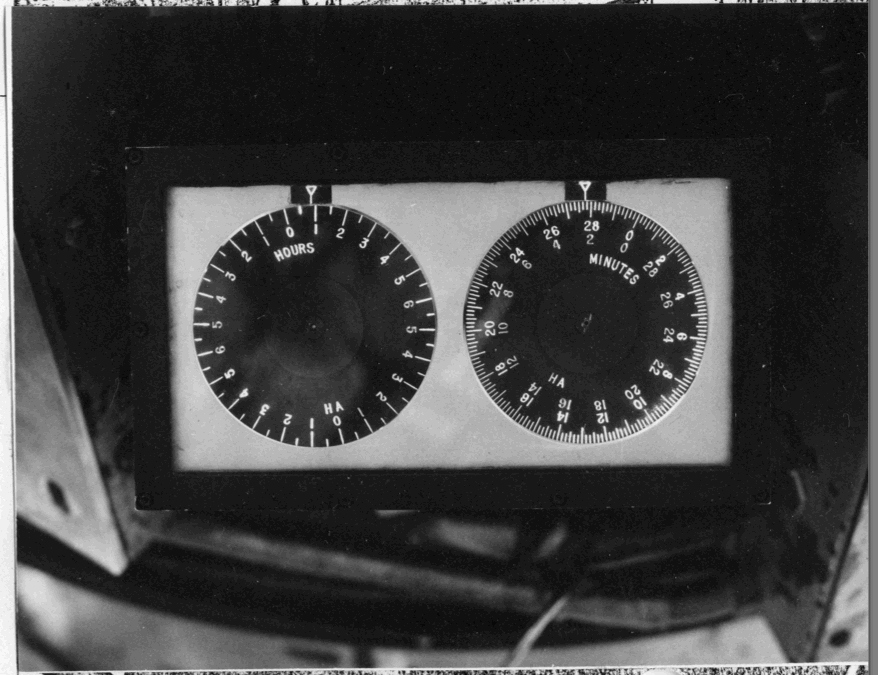
telescope (Fig. 18). The hour angle dials are similar, and are to the
right of the eyepieces (Fig. 19). Each bank of dials has its own
rheostat for the dial lights, located on the bottom (that is,
underneath) and to the right. Notice that the minutes dial in each
case turns one complete revolutions in only 30 minutes, not 60. On
the dec degrees dial, white markings are for northerly declinations
and red is used for declinations south of the equator. On the RA dial,
the outside scale is used with the tube east of the polar axle (the
usual case) and the inside scale is used with the tube west.
After you have set on a focus star and checked the coordinates, you
may find that the RA dials are farther off than is reasonable (perhaps
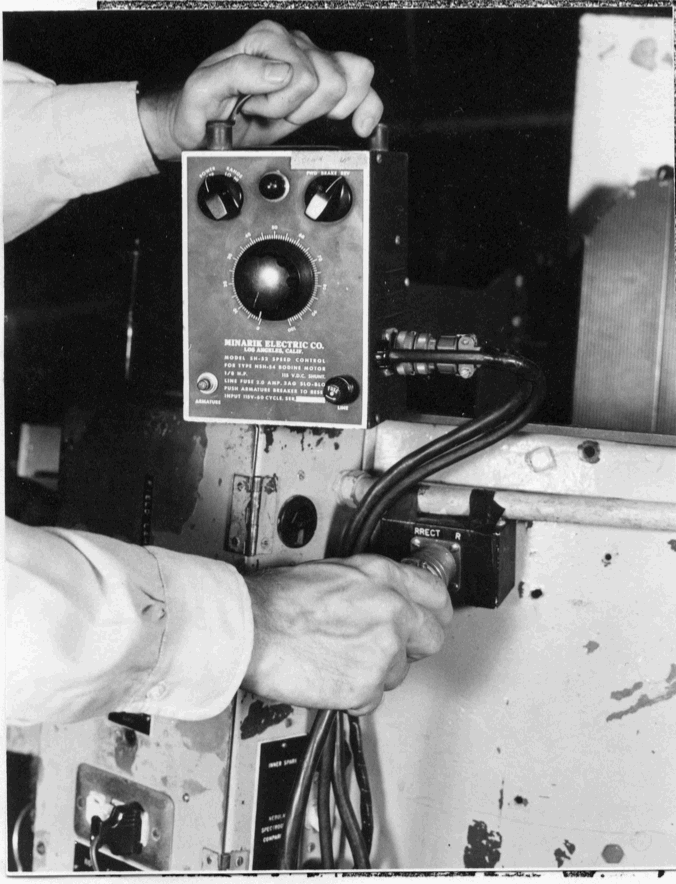
more than a couple of minutes). In this case, you may reset the RA
dials by using the portable rheostat on the shelf below the logbook
counter. One cord plugs into the 110v. outlet at the bottom of that
counter and the other plugs into an Amphenol receptacle at the outside
top rim of the telescope about two feet to the right of the eyepieces
(Fig. 20). After it's plugged in, be sure the rheostat is all the way
down (to zero) then turn on the rheostat power to "low" (upper left
switch on the rheostat box) and select "up" or "down" with the upper
right switch. Watch the RA dials as you turn the rheostat up from
zero; if they don't turn the direction you desire set the "up-down"
switch to the other position. Set the dials to the ephemeris
coordinates for the star on which you are centered, then turn the
rheostat back to zero, power off, unplug and store neatly back on its
shelf.
|
 |

Figure 18

Figure 19

Figure 20
|