|
As you come up the stairs from the ground floor, the circuit breaker
panel (Fig. 2) will be directly ahead of you (if the dome is stowed in
its proper position) attached to the dome wall to the left of the
slit. The main dome light switches are in the bottom center portion
of this panel just above the shutter "Open," "Close" and "Stop"
switches (Fig. 3). There are three light switches; the left two are
for the dome lights and the right one is for a red light above the
circuit breaker panel. The dome lights may also be controlled by two
guarded switches on the rail at the top of the platform stairs
(Fig. 4).
The dome shutter is opened and closed by the pushbuttons just below
the light switches on the circuit breaker panel. These buttons do not
need to be held down. If you desire to stop the shutter before it
reaches the end of its travel, use the red button. Normally the
shutter limit switches stop the motion when fully open or closed. The
shutter sometimes binds up, especially when it's very cold and there
is ice on the shutter tracks, so it is suggested you stay near the red
stop button until the shutter has completed its travel. When all the
way open or closed it will (should!) stop by itself. If it has snowed
recently, do not attempt to open the shutter unless a telescope technician
(ext. 8-0652) tells you it is okay. Before the
shutter can be opened safely, snow and ice must be removed from the
shutter tracks to prevent it from piling up under the wheels and
damaging the mechanism. Do not open if there is loose snow on top of
the dome which might blow in on the mirror while you work. If in any
doubt, check with a telescope technician or support astronomer.
If the shutter buttons should fail to work, either to open or close,
the cause will probably be a rocker limit switch/interlock which has
failed to trip. These are located at the bottom of the slit (Fig. 5).
The usual failure leaves the center switch level when the dome is open
so the shutter does not close. Simply lower the windscreen so you can
reach over it and tip the center rocker switch to your left (as you
face out the slit), then you should be able to close the dome in the
normal manner. If you note these failures in a trouble report to the 3-m
telescope operator (ext. 8-0652), the
telescope and dome maintenance people will know
an adjustment is required.
One you have opened the dome, keep a sharp eye on the weather, which
on Mt. Hamilton may go from completely clear to foggy in very little
time indeed! Once you have opened the dome, responsibility for
protecting the telescope lies wholly with you. For photoelectric work
there is usually less reason to worry about stabilizing the mirror
temperature than there is for long exposure photographic work, simply
because convenient opportunities for refocusing arise more
often. Therefore the risk of leaving the mirror exposed and perhaps
unwatched for the late afternoon hours is not usually worth it.
However, if for some reason you feel you must have the mirror exposed
for a few hours before observing, stay alert and in a place where you
can observe any changes in the weather; i.e., do not go back to your
room and fall asleep! The safest policy is simply not to leave the
dome with the shutter open.
The proper stow position for the dome is with the slit pointing
roughly southeast, the east dome drive motor within the area marked
off with white lines on the floor at the top of the mezzanine stairs,
and with the black tape on the dome near the floor (between the dome
drive motor and the circuit breaker panel) lined up with the black
tape on the east mezzanine floor (Fig. 6).
|
 |
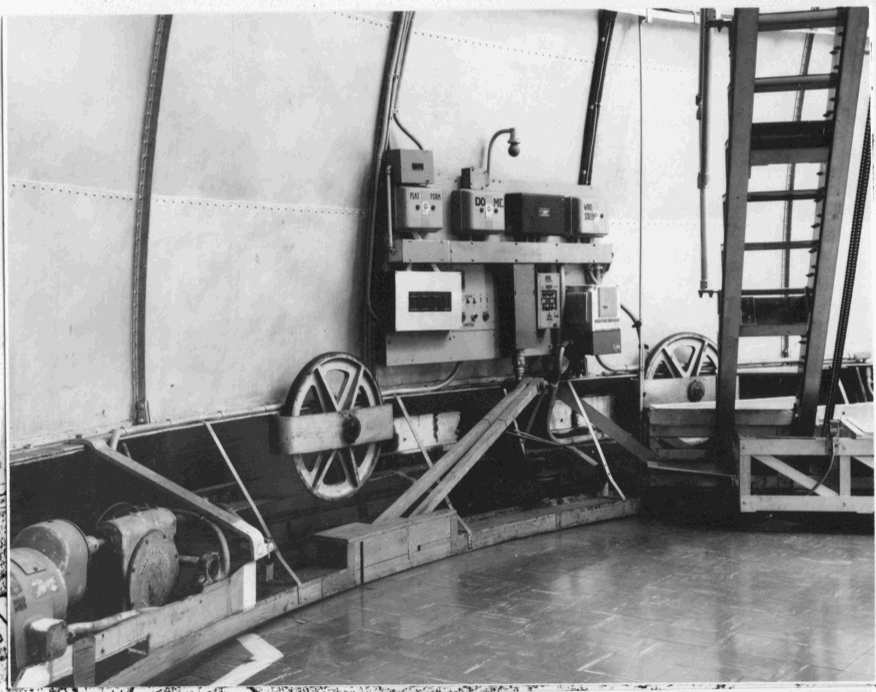
Figure 2
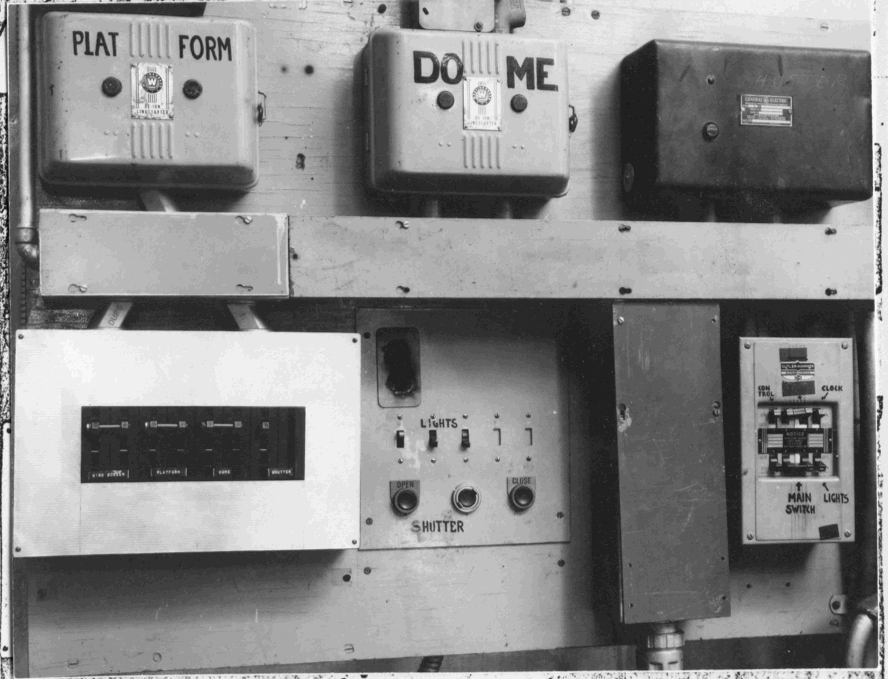
Figure 3
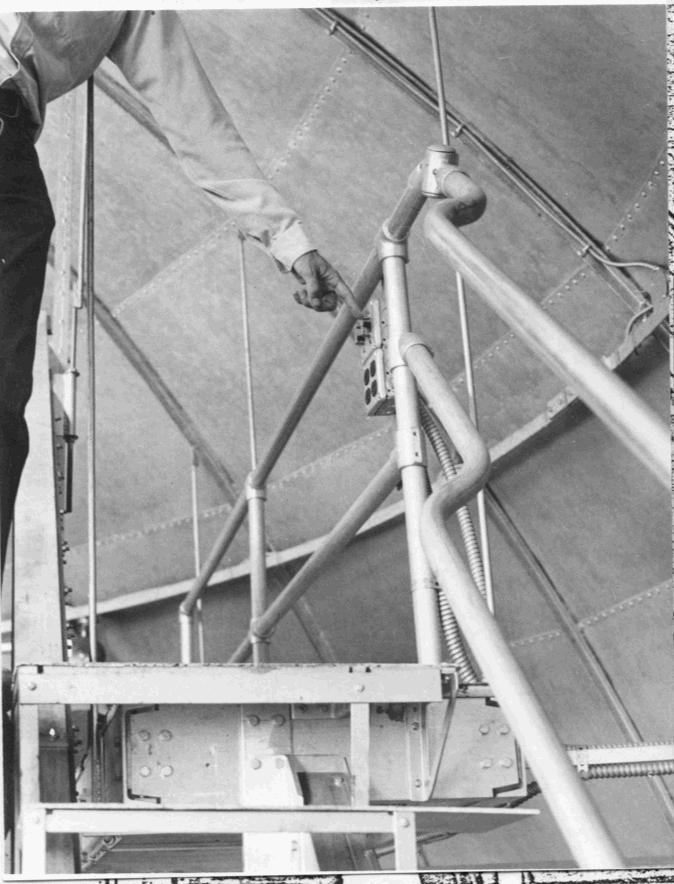
Figure 4
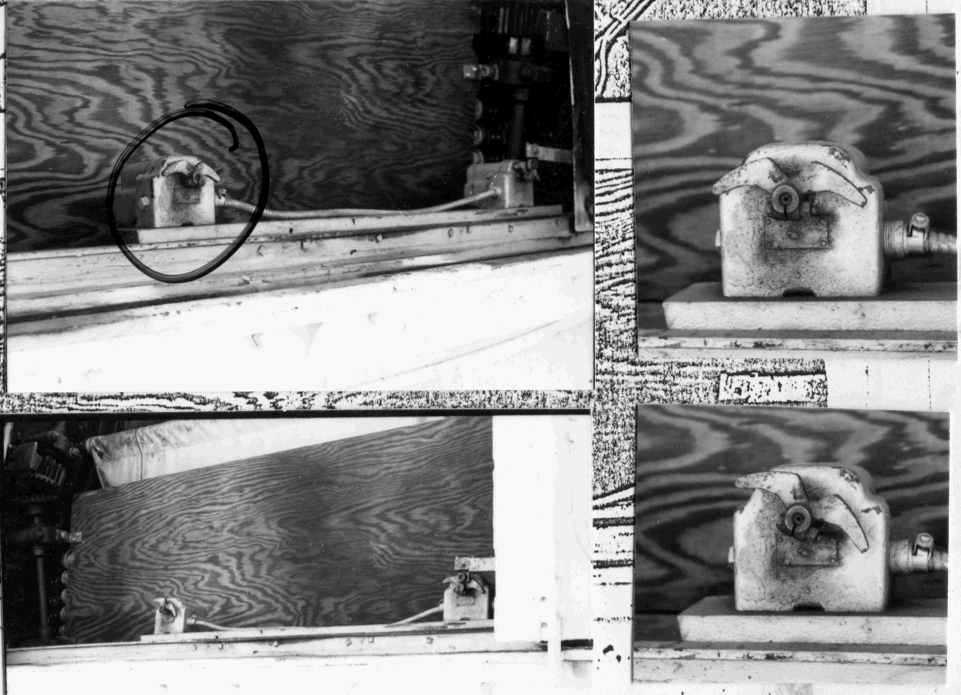
Figure 5
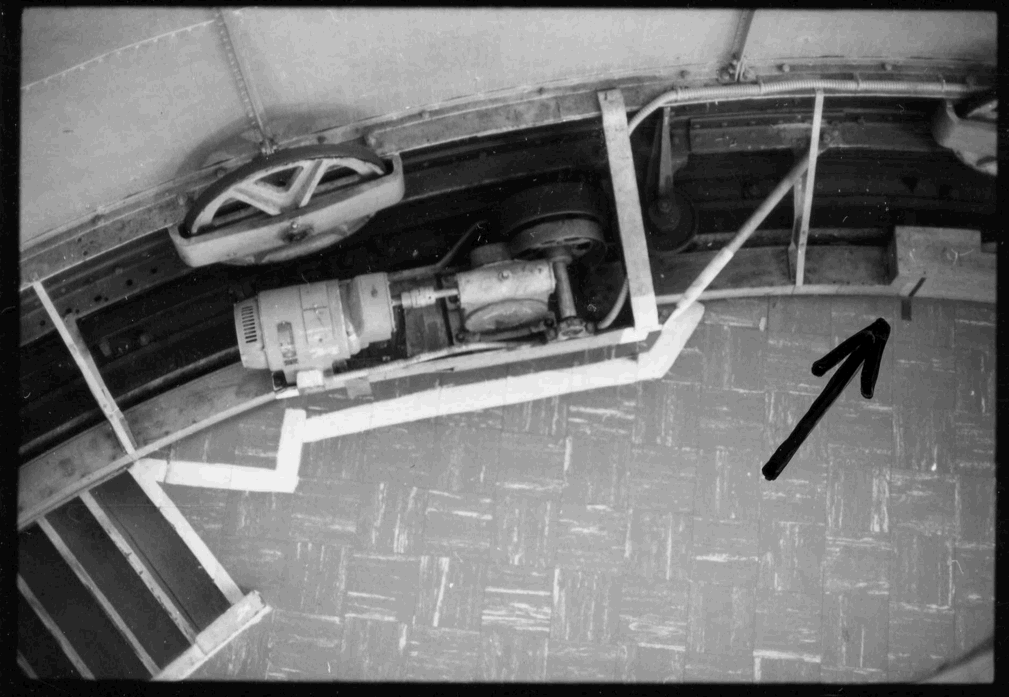
Figure 6
|