Readying the Spectrograph
The Coudé Camera Room
The Anteroom: CCD Controllers & Stickymats
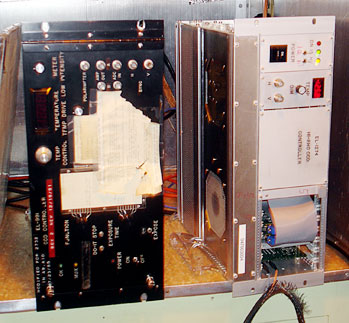
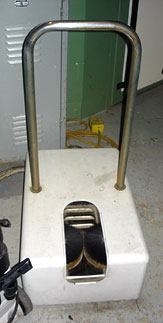
At the time of this writing, both CCD controllers are located on a shelf in the anteroom (plans are underway to move at least one to the camera room, nearer the CCD). In the picture at left, the lefthand controller is for dewar #6, the right for #8. Observers don't usually need to do anything with the controllers, but should note the CCD temperature displayed on the front panel of the one they are using, and check that the temperature is constant to within a few degrees on subsequent visits to the camer room.
Opening the Spectrograph Optics
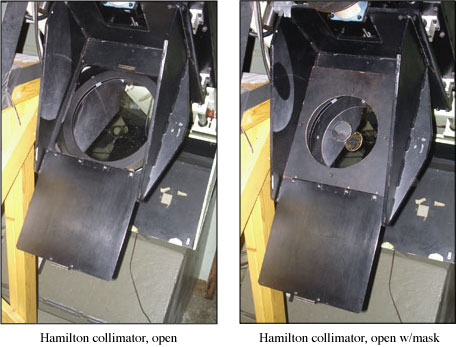
The Hamilton optics are suspended from the large I-beam on the east side of the camera room (left when looking down into the room). Three of them must be opened: the collimator, the cross-dispersing prisms, and the echelle grating. They are presented below in the order in which they should be opened. The grating is the most susceptible to permanent damage. To afford it maximum protection, it should always be the last optic opened and first closed. 1. The Collimator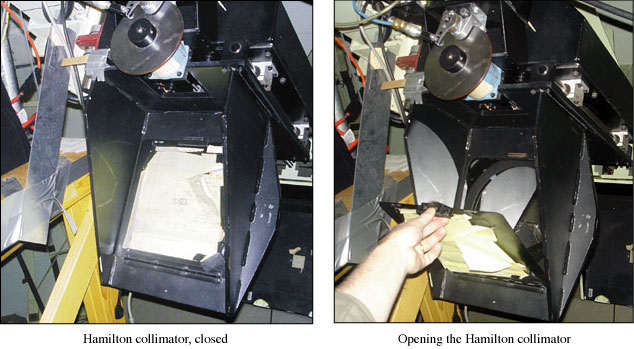 Three collimating mirrors are suspended from the right side of the I-beam.
Only one is used with the Hamilton, but observers occasionally
confuse it with one further up the I-beam. The Hamilton collimator is the
middle one of the three, and is located adjacent to the wooden platform
about two-thirds of the way down the camera-room steps.
The collimator cover is hinged along its lower edge, and is opened
by pulling on a small handle along its upper edge. The latch is magnetic
and requires a fairly firm pull to release. When fully open, the collimator
cover hangs from its hinged edge.
Three collimating mirrors are suspended from the right side of the I-beam.
Only one is used with the Hamilton, but observers occasionally
confuse it with one further up the I-beam. The Hamilton collimator is the
middle one of the three, and is located adjacent to the wooden platform
about two-thirds of the way down the camera-room steps.
The collimator cover is hinged along its lower edge, and is opened
by pulling on a small handle along its upper edge. The latch is magnetic
and requires a fairly firm pull to release. When fully open, the collimator
cover hangs from its hinged edge.
![]()
2. The Cross-dispersing Prisms
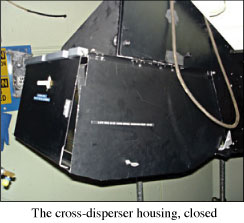
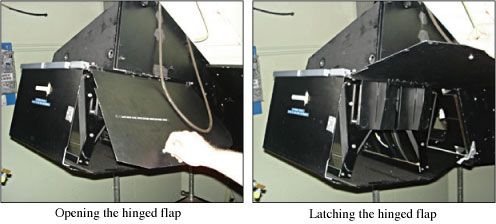
First, open the hinged flap on the west (right) side of the cross-disperser housing, latching it in place with the wire hook attached to the I-beam. Don't forget this step! Observers sometimes inadvertanly neglect to do so. The spectrograph will work, but the flap will occult at least a third of the beam.
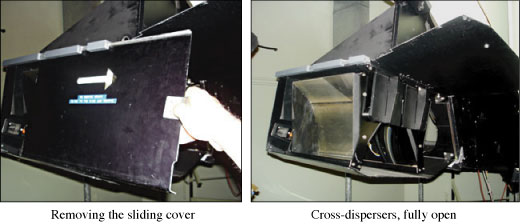
 Second, slide the metal cover on the front side of the cross-disperser
towards you, remmoving it completely from the housing. Stow it by leaning
against the step below the cross-disperser, in such a way that it will
not cause a tripping hazard.
Second, slide the metal cover on the front side of the cross-disperser
towards you, remmoving it completely from the housing. Stow it by leaning
against the step below the cross-disperser, in such a way that it will
not cause a tripping hazard.
3. The Echelle Grating
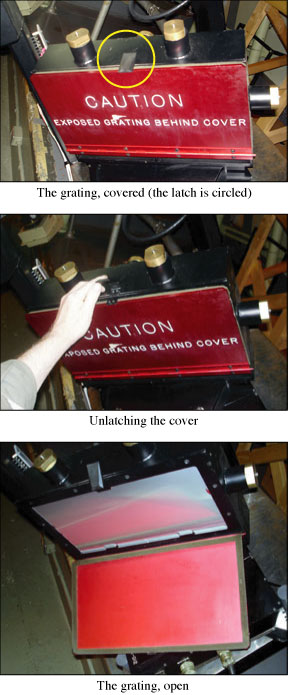
The grating cover is hinged along its lower edge, and held closed by a latch at the center of its upper edge (the latch is circled in the top illustration at left). You may stand either in front of or behind the grating to open the cover, but remember not to pass by the grating surface once it is open. To realease the latch, lift its back end then bring the the whole latch forward and up. Hold the cover closed while unlatching so that it does not fall open.
With one hand placed on the still-closed cover, carefully lower it until it comes to rest on the grating mount.