The Spectrograph Control Interface: hamit
Grating | Height | CCD Focus | Slit | Decker | Filter | Lamp | Recalibrate | TV Control
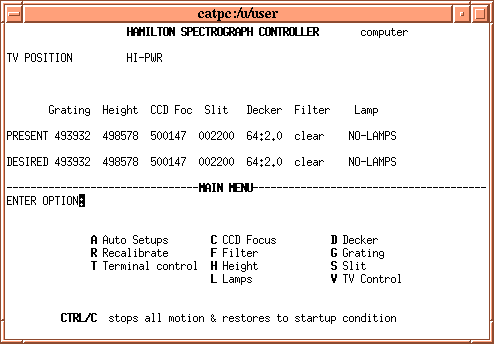
The motor-driven parts of the spectrograph, the calibration lamps, and some acquisition/guide TV functions, are controlled through the hamit user interface. Some options ask for keyboard entry, others invoke sub windows. The top level menu, shown below, is the entry point for all hamit operations. Each, except for Auto Setups and Terminal Control, which are rarely if ever used, is explained in this section. N.B. At the time of this writing, August '08, a new motor control system is planned for the Hamilton. When this upgrade is finished, hamit will be replaced with a new interface).hamit must run on the computer catpc. To start the software type hamit at the prompt in an xterm window.
G - Grating
This option rotates the echelle grating, allowing the placement of the spectrum on the detector to be adjusted in the dispertion direction. See also Navigating the Format.
H - Height
This option adjusts the vertical position of the CCD and dewar, changing the placement of the spectrum on the detector in the direction perpendicular to dispersion. See also Navigating the Format.
C - CCD Focus
This option pistons the CCD and dewar back and forth along the optical axis, moving the detector through the spectrograph's focal plane to find best focus. Total travel is small, and constrained by software and hardware limits. Five units of focus motion equal about .001-inch. Changes in focus quality are discernible at increments of 1 or 2 units. See also Focusing.
S - Slit
This option adjusts the width of the slit jaws. Because the slit is no longer used for most observations (having been replaced by an aperture plate), slit adjustment is rarely necessary (except in the case of longslit observations). When the aperture plate os selected the slit jaws are automatically opened to their widest extent (2200-microns).
D - Decker
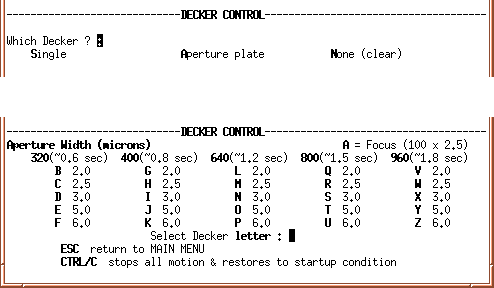
"Decker" is a misnomer, as the option now selects among a series of entrance apertures which have replaced the original slit/decker assembly. The option invokes a first submenu which offers three choices: Single, Aperture plate, and None (clear). The "Single" option is only used in the unlikely event that the original decker has been reinstalled; "Aperture plate" invokes another submenu which allows the user to select among 26 apertures (for details on choosing appropriate apertures, see Setting Up, Taking Calibrations, and Taking Data); "None" moves the aperture plate clear of the optical path, exposing the slit jaws for longslit observing.
F - Filter
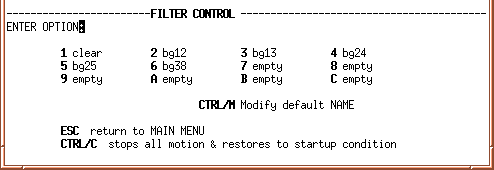
This menu controls the 12-position filter wheel behind the entrance slit. Filters are used almost exclusively for calibrations and longslit observations. Filter-wheel position 1 is always kept clear and is the position almost always used for observing. The filters in positions 2-6 are permanently mounted in the wheel and are adequate for most calibration needs. The remaining positions are user-configurable, but changing filters should not be attempted on your own unless you have been trained in doing so by resident support astronomer. N.B.If you do change filters, you must remember to update the filter names to reflect changes in the filterwheel's contents! See changing filters.
L - Lamp
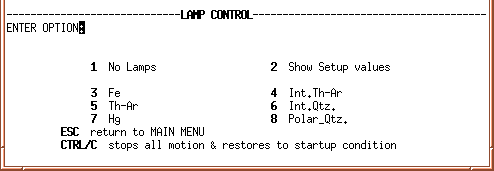
The lamp menu allows the user to turn on any one of several calibration light sources (motions are also required to insert a lamp or direct its light into the instrument, but these motions are automatically carried out when a lamp is selected). Lamps are described under Calibration Sources, and their use detailed under Taking Calibrations.
R - Recalibrate
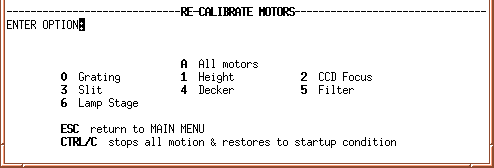
This option allows the user to return spectrograph settings to their "home" positions: arbitrary, predefined positions, often where a stage passes an optical fiducial. Selecting Recalibrate invokes a submenu from which the user may recalibrate all motors in a single stroke, or each individually. We recommend recalibrating all motors at the beginning of a run, unless you are sure of the previous observer's settings (if you are using the same dewar as the previous observer, it is wise to jot down the grating, height, and CCD focus settings before recalibrating, as they might provide a good post-calibration starting point for your setup).
V - TV Control
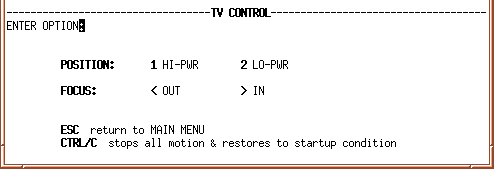
This option allows the user to select between two possible magnification settings for the acquisition/guide TV, and to remotely focus it on the entrance apertures. The system is described under Acquisition/Guide TV, and its use detailed under Acquisition and Guiding.
Support Astronomers (sa@ucolick.org) Last modified: Tue Aug 4 15:31:04 PDT 2009
